Why Rear Defroster Repair Kit Is Necessary?
A rear defroster repair kit is a necessity because it helps to keep your rear window free from frost, ice and snow. As the winter months approach, temperatures can drop significantly in many regions. This can cause windows to become covered in frost and make it difficult to see while driving. The best way to ensure clear visibility and safe operation of your vehicle is by using a high quality rear window de-froster repair kit that can effectively prevent frost buildup on the surface of the glass. A good kit will include all the necessary components such as scrape blades, heating elements, adhesive strips and electrical wiring for connecting them together into one system that works in order to keep your view clear all winter long.
Our Top Picks For Best Rear Defroster Repair Kit


Best Rear Defroster Repair Kit Guidance
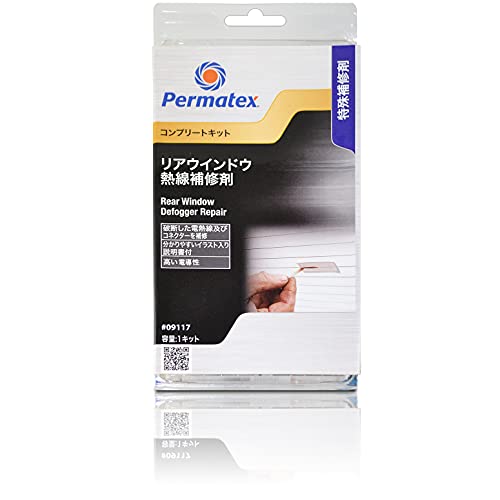
Permatex 09117 Complete Rear Window Defogger Repair Kit, Single Unit (Packaging may vary)
Common Questions on Permatex 09117 Complete Rear Window Defogger Repair Kit, Single Unit (Packaging may vary)
• What is included in the Permatex 09117 Complete Rear Window Defogger Repair Kit?The Permatex 09117 Complete Rear Window Defogger Repair Kit includes an adhesive, a conductive backing strip, a spring clip, a plastic scraper, and detailed instructions for installation.
• Does the Permatex 09117 Complete Rear Window Defogger Repair Kit come with a warranty?
Yes, the Permatex 09117 Complete Rear Window Defogger Repair Kit comes with a limited 1 year warranty from the date of purchase.
• Does the Permatex 09117 Complete Rear Window Defogger Repair Kit work with all car models?
No, the Permatex 09117 Complete Rear Window Defogger Repair Kit works with select car models. Please consult the product manual for compatible vehicles.
• How long does it take to install the Permatex 09117 Complete Rear Window Defogger Repair Kit?
Installation of the Permatex 09117 Complete Rear Window Defogger Repair Kit typically takes approximately 30 minutes.
• Is the packaging of the Permatex 09117 Complete Rear Window Defogger Repair
Why We Like This
• 1. Everything required for professional quality repairs in minutes• 2. State of the art components and easy to follow instructions with photographs• 3. Low cost, high quality repair for damaged rear window defogger grids and tabs• 4. Premium repair kit for both professionals and ‘Do It Yourself’ers• 5. Packaging may vary for convenience
Additional Product Information
| Height | 1.5 Inches |
| Length | 8 Inches |
Frost Fighter Rear Defroster Tab Bonding Kit
Common Questions on Frost Fighter Rear Defroster Tab Bonding Kit
Why We Like This
• 1. Easy DIY repair for defroster tab separation.• 2. Over 80% silver content for highly conductive tab bonding.• 3. Quick curing two part adhesive for strong bonding.• 4. Bonds aggressively to glass and defroster coatings.• 5. System specifically engineered for tab bonding.
Additional Product Information
| Color | Silver |
| Height | 1.49999999847 Inches |
| Length | 7.99999999184 Inches |
| Weight | 0.000625 Pounds |
Frost Fighter Rear Window Defroster/Defogger Tab Bonding Repair Kit 2000
If you’ve experienced the frustration of a rear window defroster that’s not functioning properly, then you’re probably familiar with Frost Fighter’s Rear Window Defroster/Defogger Tab Bonding Repair Kit 2000. This innovative kit will help you get your defroster working with maximum efficiency once again.
The kit contains all the components necessary to complete the repair. It comes with a high percentage of silver for maximum electrical conductivity and special mixing sandpaper, mixing pads, and stir sticks. Also included is an adhesive that ensures a rugged and reliable bond for the rear window defroster. By using this product you’re assured of a strong and lasting connection that will keep your rear window defroster working for years to come.
Plus, it’s approved by General Motors for defroster repair and defogger repair so you know it’s up to the task. The kit will take the guesswork out of any repair, saving you time and money in the process. What’s more, its intuitive design makes it easy to use and quick to apply – what could be better?
Whether it’s normal wear and tear or something
Common Questions on Frost Fighter Rear Window Defroster/Defogger Tab Bonding Repair Kit 2000
• What is included in the Frost Fighter Rear Window Defroster/Defogger Tab Bonding Repair Kit 2000?This kit includes a professional-grade adhesive, a scraper tool, a cloth, and instructions.
• How do I use the Frost Fighter Rear Window Defroster/Defogger Tab Bonding Repair Kit 2000?
The kit must be used according to the instructions provided in the kit. Generally speaking, you should apply the adhesive to the tabs, scrape away excess, remove dirt and dust from the window, apply the adhesive to the windows, and firmly press the tabs onto the window.
• Is the Frost Fighter Rear Window Defroster/Defogger Tab Bonding Repair Kit 2000 easy to use?
Yes! This kit is designed for easy, at-home use and contains clear instructions that make it easy to follow.
• Can I use the Frost Fighter Rear Window Defroster/Defogger Tab Bonding Repair Kit 2000 on any vehicle?
No, this kit is specifically designed for use on vehicles with a rear window defroster/defogger tab.
• Does the Frost Fighter Rear
Why We Like This
1. High silver content for maximum electrical conductivity
2. Bonds metal tabs back to rear window defrosters
3. Includes mixing sand paper, mixing pads, and stir sticks
4. Approved by General Motors for defroster repair / defogger repair
5. Adhesion promotion for rugged and reliable conductive defroster / defogger tab bonds
Additional Product Information
| Color | Silver |
| Height | 1.49999999847 Inches |
| Length | 7.99999999184 Inches |
| Weight | 0.992080179 Pounds |
Frost Fighter Rear Window Defroster/Defogger Grid Repair Kit 2120
Common Questions on Frost Fighter Rear Window Defroster/Defogger Grid Repair Kit 2120
• What format does the Frost Fighter Rear Window Defroster/Defogger Grid Repair Kit 2120 come in?The Frost Fighter Rear Window Defroster/Defogger Grid Repair Kit 2120 comes in a two-part repair kit with a steel wire grid and an adhesive backing.
• Is the Frost Fighter Rear Window Defroster/Defogger Grid Repair Kit 2120 easy to install?
Yes, the Frost Fighter Rear Window Defroster/Defogger Grid Repair Kit 2120 is designed for an easy installation. You simply cut the grid to match your window size, peel the adhesive backing, stick it to the glass, then trim away the excess material.
• Does the Frost Fighter Rear Window Defroster/Defogger Grid Repair Kit 2120 have a warranty?
Yes, Frost Fighter’s Rear Window Defroster/Defogger Grid Repair Kit 2120 comes with a limited lifetime warranty.
• How long will the Frost Fighter Rear Window Defroster/Defogger Grid Repair Kit 2120 last?
The Frost Fighter Rear Window Defroster/Defogger Grid Repair Kit 2120 is designed for long-term use
Why We Like This
Additional Product Information
| Height | 1.49999999847 Inches |
| Length | 7.99999999184 Inches |
Frost Fighter Rear Window Defroster Replacement Connector – 2320 – Repair Damaged or Broken Rear Window Defrosters
Plugging into a Frost Fighter Rear Window Defroster Replacement Connector – 2320 can help repair a broken or damaged rear window defroster. This connector’s universal compatibility allows it to fit all makes and models, for maximum convenience to you. Installing the connector requires no special tools – simply use pliers to attach the wire from your vehicle, and you’re good to go! The housing ensures that the finished product looks neat and factory-fresh. Never worry about having to replace a broken or damaged rear window defroster again by using the Frost Fighter 2320 Rear Window Defroster Replacement Connector.
Common Questions on Frost Fighter Rear Window Defroster Replacement Connector – 2320 – Repair Damaged or Broken Rear Window Defrosters
• How do I replace a Frost Fighter Rear Window Defroster Connector?To replace a Frost Fighter Rear Window Defroster Connector, first disconnect the power to the rear window defroster. Then remove the outer cover of the connector by prying it with a flat-head screwdriver. Using a small Phillips-head screwdriver, remove the screw that holds the metal tab in place. Unplug the defective connector and insert the new one in its place. Tighten the screw to secure the tab. Reattach the outer cover, and then restore power to the rear window defroster.
• What should I use to replace a Frost Fighter Rear Window Defroster Connector?
The Frost Fighter Rear Window Defroster Replacement Connector Part No. 2320 should be used for replacement.
• How do I install the Frost Fighter Rear Window Defroster Replacement Connector?
To install the Frost Fighter Rear Window Defroster Replacement Connector, first disconnect the power to the rear window defroster. Then remove the outer cover of the connector by prying it with a flat-head screwdriver. Using a small Phillips-head screwdriver, remove the screw that holds the
Why We Like This
• 1. Replacement connector for rear window defrosters• 2. Compatible with all makes and models• 3. Fits all rear window defroster tabs• 4. Connector is applied to wire using pliers• 5. Includes housing for finished factory appearance
Additional Product Information
| Height | 1.49999999847 Inches |
| Length | 7.99999999184 Inches |
Buying Guide for Best Rear Defroster Repair Kit
Materials Needed
When repairing a rear defroster, you will need the following items: Soldering iron, soldering wire, heat shrink tubing, electrical tape and a rear defroster repair kit.
Types of Kits Available
There are several types of rear defroster repair kits available on the market. The most common are conductor-style kits that include conductive ink and conductive tape. These kits are relatively easy to install and provide reliable repairs. There are also epoxy-style kits available that include an epoxy patch and conductive material. These kits provide a more permanent fix but may require some additional preparation before installation.
Installation Process
The installation process for a rear defroster repair kit will vary depending on the type of kit purchased. For conductor-style kits, the process is fairly straightforward. Begin by cleaning the area of the defroster where the repair needs to be made with rubbing alcohol or another solvent cleaner. Once clean, use the conductive ink to draw a line over the area where the repair needs to be made before applying the conductive tape over top of it. Finally, apply heat shrink tubing over top of both materials to create an insulated seal.
For epoxy-style kits, begin by cleaning off any debris from around the damaged area with rubbing alcohol or another solvent cleaner. Once clean, apply epoxy patch material over top of the damaged area and press firmly into place with a cloth or paper towel. Allow this material to dry for approximately one hour before applying conductive material as instructed in your kit’s instructions and then sealing it with heat shrink tubing as described above for conductor-style kits.
Checking for Proper Repair
Once you have completed your installation you should check for proper repairs by turning on your vehicle’s rear defroster and confirming that heat is being generated evenly across its surface. If you notice any hot spots or weak areas on your rear defroster then it is likely that additional repairs may be needed or that you have not created an adequate seal between your repair materials and heat shrink tubing when installing them originally.
Additional Tips
When working with any electrical components such as those found in a rear defroster it is important to exercise caution at all times to avoid shocks or other potential hazards that could occur during repairs or installation processes. Additionally, when using any type of epoxy material in your installation process make sure that it has been properly mixed prior to application as this will ensure optimal results when finished installing your repair kit